
Materials affect your home maintenance cost by changing how a repair is prepared, secured, and finished—not just what supplies you need to buy. For your 2026 repair plan, account for the condition beneath the surface and the work needed to match the surrounding finish; replacing a visible part does not necessarily address either.
- Home maintenance cost depends on material condition, repair access, and finish matching—not supplies alone.
- Drywall repairs and painting need separate decisions about surface repair and the area to repaint.
- Furniture assembly and wall mounting require attention to fasteners, supporting materials, and manufacturer instructions.
- Mr. Mitchell's Home Maintenance & Services suits homeowners seeking online booking and several small repairs in one visit.
How do materials affect home maintenance costs?
Materials determine the repair method; damage and the finish you want determine how much work follows. A loose cabinet hinge needs a different approach when its screws have lost their grip than when the hinge itself is damaged. Likewise, filling a wall hole and making the repair blend into the room are separate tasks.
Before you schedule an appointment with Mr. Mitchell's Home Maintenance & Services, describe both the material and the symptom. Include what you want the finished repair to look like, not just what is broken.
| Material or surface | Useful characteristic | Repair limitation | Best for your repair plan |
|---|---|---|---|
| Painted drywall | Localized damage can be patched | Texture and paint matching remain separate tasks | Defined holes or dents with sound surrounding material |
| Painted plaster | Sound surrounding plaster can remain in place | Loose or deteriorated material changes the repair scope | Repairs that begin with a condition check |
| Solid wood hardware attachment | Sound wood can hold appropriate fasteners | Split wood or damaged holes need attention | Hardware repairs with a secure attachment point |
| Particleboard furniture or cabinets | Intact panels accept their intended fittings | Damaged fastener holes can limit reattachment options | Assembly or adjustment where panels remain sound |
| Painted trim or cabinet surfaces | A coating can restore a consistent appearance | Preparation and compatibility affect the finish | Repairs planned around both function and appearance |
These are repair-planning distinctions, not a ranking of which material is always cheaper. Compare the same scope: preparation, repair, installation where relevant, and finishing.
Why this matters for NYC homeowners
A Brooklyn or Queens repair list can combine a chipped wall, a sticking cabinet door, an unassembled bookcase, and a shelf waiting to be mounted. Those jobs do not become equivalent because they are all small. Each depends on a different surface, attachment, or finishing requirement.
For a useful 2026 home maintenance budget, separate what you can see from what needs checking. A wall photo shows the damage; it does not establish what is behind the wall. A photo of a loose hinge shows its position; it does not establish whether the screw holes still hold securely.
Mr. Mitchell's Home Maintenance & Services is best for homeowners who want online booking and several small repairs handled in one visit. Grouping jobs gives you a practical way to organize the appointment, but it is not a promise of lower charges or completion of every task regardless of condition.
Drywall and plaster: repair the surface before matching it
For drywall repairs and painting, identify the damaged area and the surrounding condition separately. A small hole with firm edges is not the same scope as a damaged area with soft, crumbling, or loose material around it. Avoid choosing a repair solely by how large the opening looks from across the room.
Photograph the entire wall, then take a close-up of the damage. Explain whether the area feels firm, whether paint is peeling nearby, and whether the problem has returned after an earlier repair. If there is active dampness, report it before planning a cosmetic patch.
What to prepare before the appointment
- Damage location: Identify the room and whether the repair is on a wall or ceiling.
- Surrounding condition: Note loose paint, crumbling edges, staining, or recurring cracks.
- Finish goal: Say whether you want a local repair or a broader, consistent painted finish.
- Access: Move objects that prevent a clear view of the affected area.
A localized patch preserves more of the surrounding surface. Its limitation is appearance: even a repaired area can remain noticeable if the texture, color, or sheen differs. Agree on the finish expectation before treating the patch as the complete job.
Paint: the finish matters as much as the color
Matching a paint color does not establish that a touch-up will disappear. Sheen, surface texture, application, and the condition of the existing coating all affect the result. A small repair can therefore involve a larger finishing decision.
Keep any labeled paint containers or records from the original work. Provide the manufacturer, color name or code, and sheen if you have them. Those details are more useful than a description such as warm white, but they do not guarantee an invisible match.
Best for a limited touch-up: a defined area where the existing coating is sound and matching paint information is available. The advantage is a focused scope; the limitation is that the boundary can still show.
Best for a consistent appearance: discussing repainting the affected wall rather than assuming a spot repair will blend. The advantage is a clearer finish target; the limitation is a larger area to prepare and paint. Ask for that distinction in the work description rather than assuming painting is included with patching.
Furniture assembly: intact fittings matter more than appearances
Furniture material affects how its joints and fasteners behave. Solid wood, plywood, and particleboard are not interchangeable when a connection is damaged. The assembly instructions and the condition of the supplied fittings should guide the work.
For a new assembly, keep the instructions, hardware packets, and panels together. Photograph damaged corners or fittings before the visit. For existing furniture, explain where it moves or feels loose rather than asking only for everything to be tightened.
Best for straightforward assembly: complete parts, intact panels, and the correct instructions. The benefit is a defined task; the limitation is that missing hardware or damaged attachment points changes that task.
Do not repeatedly tighten a screw that no longer grips. The issue is the connection, not simply a lack of force. Include that symptom on the repair list so it can be assessed rather than hidden by a temporary adjustment.
Wall mounting: identify the support, not just the wall finish
The visible surface is only part of a wall-mounting job. The wall construction, mounting hardware, intended load, and manufacturer's instructions determine the attachment approach. A bracket fitting neatly against the wall does not establish that it is securely supported.
Send the item model, bracket information, and a photo showing the intended location. Mention nearby outlets, switches, and any known restrictions on drilling. Do not buy anchors based only on the color or texture of the wall.
Best for a ready-to-plan mounting appointment: an identified item, its intended bracket, and a clear proposed position. This makes the request specific; it does not replace checking the wall and attachment method.
Use the guide to checking your wall before wall mounting to organize those details. Keep uncertainty about the wall on the list instead of turning it into an assumption.
Doors and cabinets: check the attachment before replacing hardware
A door that rubs or a cabinet hinge that moves does not automatically need replacement hardware. The problem can involve alignment, a loose fitting, or a damaged attachment point. Replacing the visible part without identifying the cause leaves the repair poorly defined.
Show the door or cabinet open and closed in your photos. Include a close-up of the hinge, latch, handle, or damaged screw hole. If you already have a replacement, provide its packaging or model information rather than assuming similar-looking fittings are interchangeable.
Best for an adjustment-first assessment: hardware that appears intact but does not operate correctly. The benefit is checking the existing fitting before choosing a replacement; the limitation is that damaged material can require a different repair.
Keep decorative preferences separate from functional problems. Changing a handle's appearance is a different request from restoring a secure attachment. Your appointment notes should make clear whether you need either task or both.
Why material-related repair costs vary
The useful question is not simply which material costs less. Ask which parts of the repair change because of the material and its condition.
- Underlying condition: Sound material and deteriorated material need different preparation and attachment decisions.
- Repair extent: A localized defect and surrounding damage do not represent the same scope.
- Finish matching: Texture, paint color, and sheen affect how the repaired area meets the existing surface.
- Access: Furniture, stored belongings, and awkward positions affect how the work area can be reached and protected.
- Compatibility: Replacement hardware, fasteners, coatings, and mounting systems need to suit the existing materials.
- Job sequence: Patching, preparing, painting, assembling, and mounting are distinct tasks that need a workable order.
A useful work description connects each factor to your actual repair. Avoid comparing estimates that describe different finish standards or leave the condition of the attachment point unresolved.
Prepare a material-aware repair list for 2026
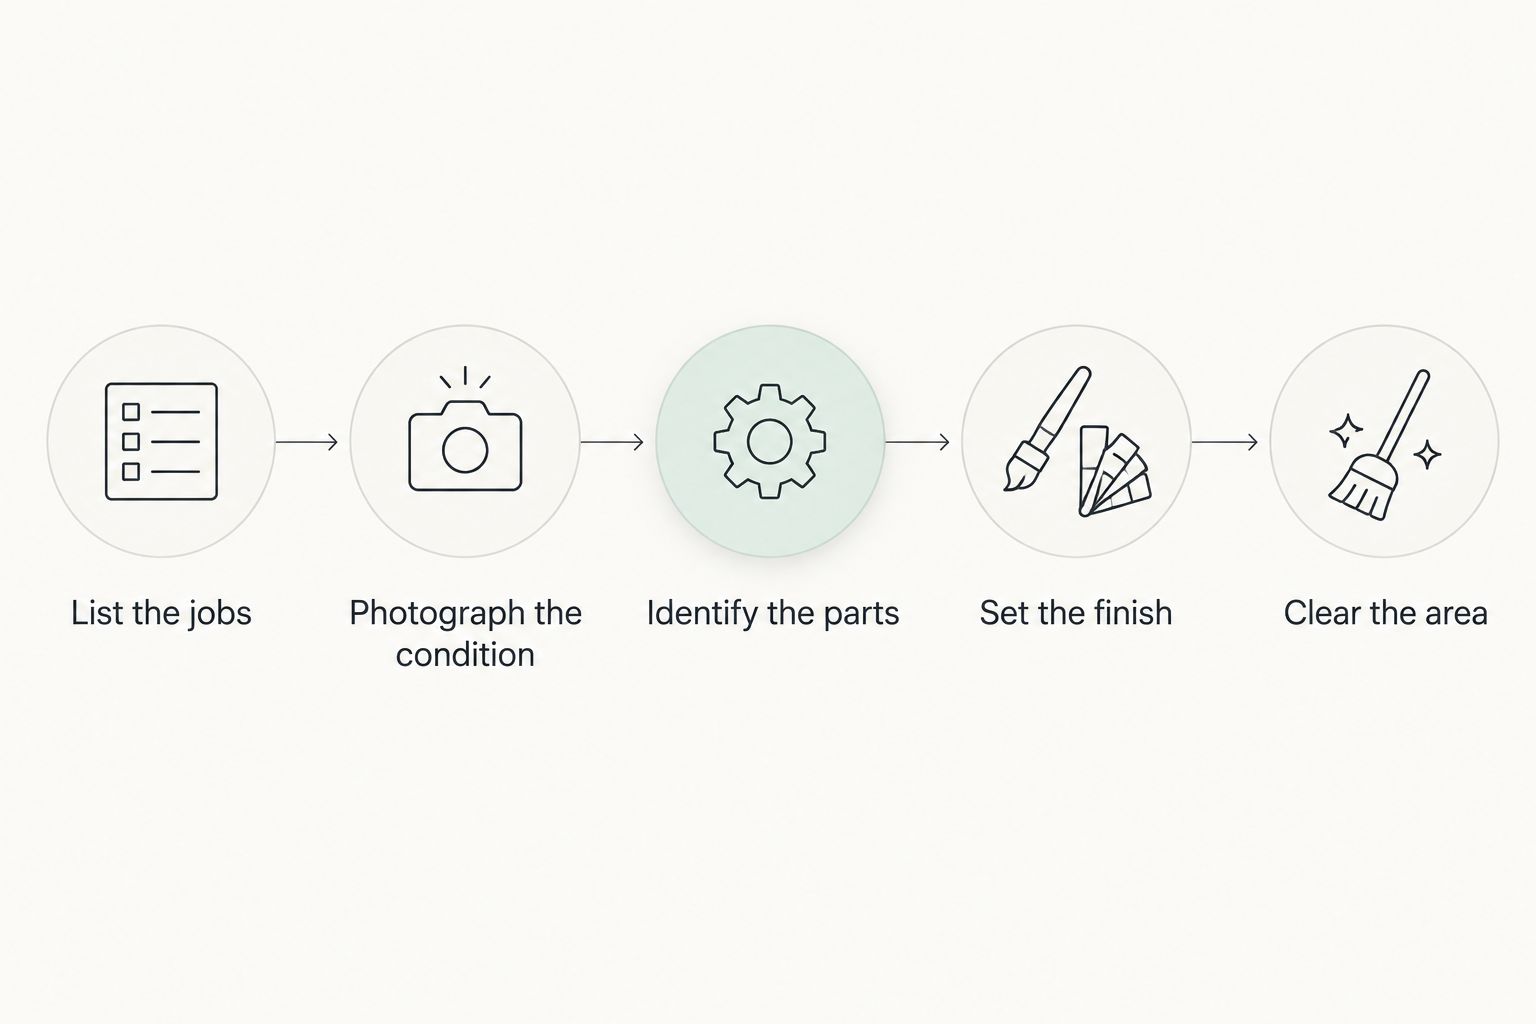
Use this sequence before booking. You do not need to identify every construction detail yourself; you need to make the visible problem and your intended outcome clear.
- List the jobs. Name each location and symptom: hallway wall hole, loose kitchen hinge, or bookcase assembly.
- Photograph the condition. Include an overall view and a close-up so the repair has context.
- Identify the parts. Gather instructions, hardware packaging, paint labels, and any replacement components you already own.
- Set the finish. Explain whether appearance, secure operation, or both define a successful repair.
- Clear the area. Make the affected wall, furniture, or hardware accessible without blocking the room's exit.
For a grouped visit, mark which jobs matter most. Put the loose fitting you use daily ahead of a cosmetic change if function is your priority. Keep related parts beside the correct item so an unidentified bag of screws does not become another question during the appointment.
How should you compare repair estimates in 2026?
Compare the described work before comparing the total. Check whether each estimate addresses the damaged material, preparation, installation, and finish you requested. A patch-only scope is not the same as a patch-and-paint scope.
Ask whether you should supply any parts and whether existing components are intended for reuse. Clarify how additional damage discovered during the repair will be discussed. These questions define the agreement without assuming a particular billing method or service policy.
Mr. Mitchell's Home Maintenance & Services offers easy online appointment booking and several small jobs handled in one visit. Bring a prioritized list and material details to make that grouped request clear.
Plan your small repair visit
Organize drywall, painting, assembly, mounting, and hardware tasks before booking online.
Is repairing existing material always better than replacing it?
Repairing existing material is not always the better choice. A sound surrounding surface supports a different decision than deteriorated material or a damaged attachment point. Ask what the repair will restore and what limitations will remain.
Can several different materials be handled in one appointment?
Several small jobs can be grouped into one visit with Mr. Mitchell's Home Maintenance & Services. Describe each task in advance, including its material, condition, and finish goal; grouping the list does not establish that every repair has the same requirements.
FAQ
Does a cheaper replacement part mean a lower home maintenance cost?
A cheaper replacement part does not establish a lower home maintenance cost. Preparation, compatibility, attachment repairs, and finishing also define the work.
Should I buy paint before booking a wall repair?
Confirm the finish plan before buying paint. Share any existing paint labels and explain whether you want a local touch-up or a consistent finish across the affected wall.
Can I use the same wall anchors for drywall and plaster?
Do not assume the same anchors suit drywall and plaster. The wall construction, intended load, and mounting system's instructions determine the attachment method.
What should I do before a furniture assembly appointment?
Keep the instructions, panels, and supplied hardware together, and clear the assembly area. Report missing fittings or damaged panels before the visit.
Does a loose cabinet hinge always need replacing?
A loose cabinet hinge does not always need replacing. The fitting, alignment, and condition of its attachment points need checking before choosing a repair.
Will grouping small repairs automatically save money?
Grouping small repairs does not establish a saving. It organizes the work into one visit, while the materials, condition, and agreed scope still determine what is involved.
One last thing
Describe the symptom before naming the solution. Write that a hinge pulls away when the door opens, not just that you need a new hinge. That detail directs attention to the attachment point instead of assuming the visible hardware is the problem.
For your 2026 maintenance list, keep a photo, location, and finish goal beside each task. Those notes make a small repair request more useful than a shopping list of replacement parts.